


CentOS 7 : how to update kernel
Introduction
The Linux kernel is the foundation on which all Linux distributions operate. It is open-source software – anyone can decompile, examine, and modify the code.
Updated versions of the kernel can improve security, add functionality, and improve the speed at which the operating system functions.
This guide will instruct you on how to upgrade the Linux kernel on CentOS 7.
Prerequisites
- A CentOS server
- Access to the command-line / terminal access
- Sudo privileges
- A recent backup of your system
Steps to Update CentOS Kernel Version
The yum package manager allows kernel updates. However, CentOS does not offer the latest kernel version in the official repository.
To update the kernel on CentOS, you’ll need to install a third-party repository called ElRepo. ElRepo offers the latest kernel version available from kernel.org.
The official releases are tested to ensure they work properly and do not destabilize applications and OS functions. There are two types of Linux kernel versions:
- Stable long-term supported kernel release – updated less frequently, but supported longer.
- Mainline kernel release – a shorter support term but more frequent updates.
Step 1: Check Your Current Kernel Version
To check current kernel version on CentOS, open a command-line interface and enter following command:
uname -msr
The system should return with an entry that appears like this:
Output
Linux 3.10.0-862.el7.x86-64 x86-64
The output indicates which version of the kernel you are currently running, and on which architecture it’s based on.
For additional information, refer to our detailed guide on how to check Linux kernel version.
Step 2: Update CentOS Repositories
Prior to upgrading the kernel, all packages must be updated to the latest version.
To update CentOS software repositories, use the command:
sudo yum -y update
Your software repository is now updated. This ensures you have access to the latest version of the kernel.
Step 3: Enable the ELRepo Repository
To install the new kernel version, a new repository (ELRepo repository) needs to be enabled.
In a terminal window, type:
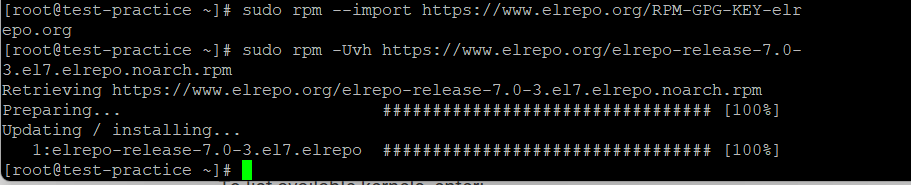
sudo rpm –import https://www.elrepo.org/RPM-GPG-KEY-elrepo.org
The previous command installs the GPG key for the ELRepo repository. This is important – CentOS will not allow the installation of an unsigned software package. The GPG key provides a digital signature to verify that the software is authentic.
Next, install the ELRepo repository by executing the following command:
sudo rpm -Uvh https://www.elrepo.org/elrepo-release-7.0-3.el7.elrepo.noarch.rpm
Allow the system to finish performing the operation.
Step 4: List Available Kernels
To list available kernels, enter:
yum list available –disablerepo=’*’ –enablerepo=elrepo-kernel
The system should return a list of available modules. In the list, note the line that says kernel-lt – signifying a stable long-term support release – or kernel-ml – which indicates a mainline release, with a shorter support term but with more frequent updates.
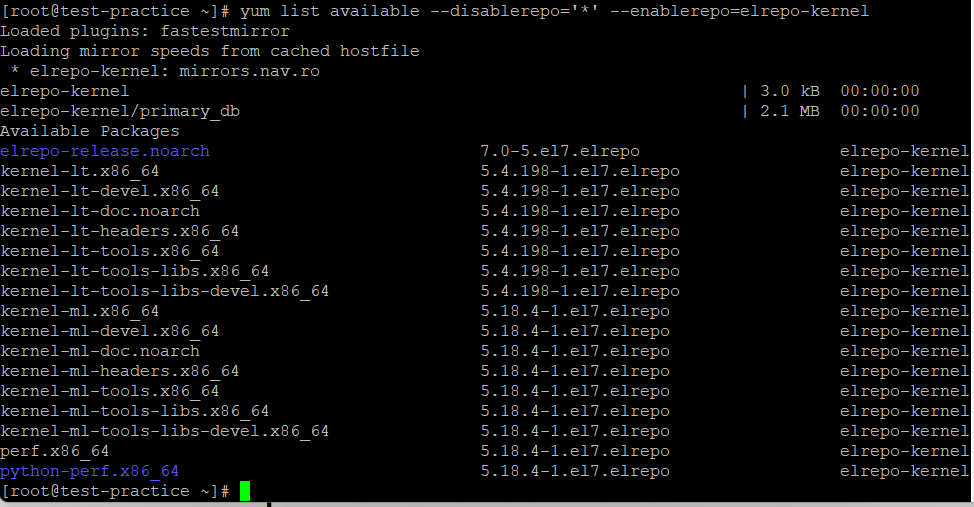
Next, look at the right-hand column, and notice a series of letters and numbers (which looks something like ‘4.4.113-1.e17.elrepo’). This is the kernel version.
Use these two pieces of information to decide which kernel version you want to install. As you can see, the Linux 5 kernel is the latest mainline release.
Step 5: Install New CentOS Kernel Version
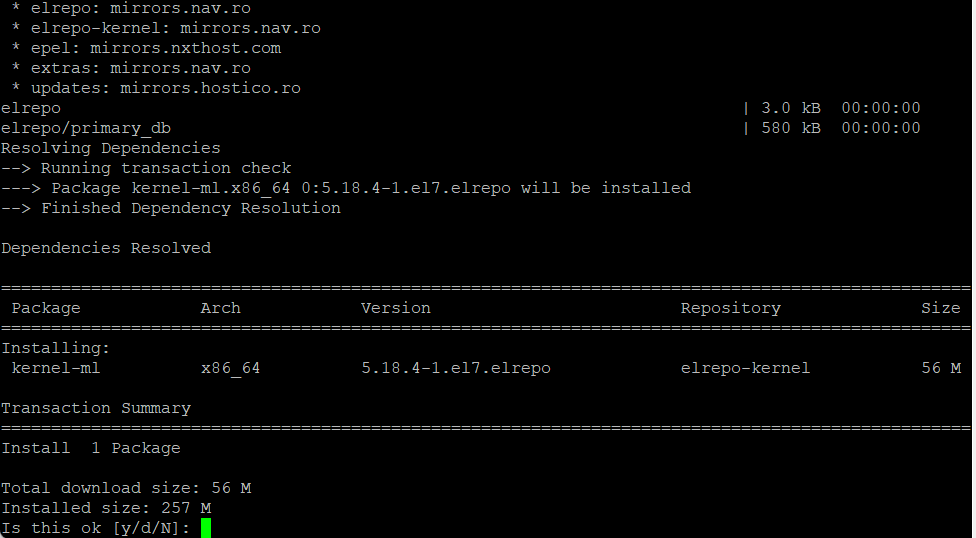
To install the latest mainline kernel:
sudo yum –enablerepo=elrepo-kernel install kernel-ml
To install the latest long-term support kernel:
sudo yum –enablerepo=elrepo-kernel install kernel-lt
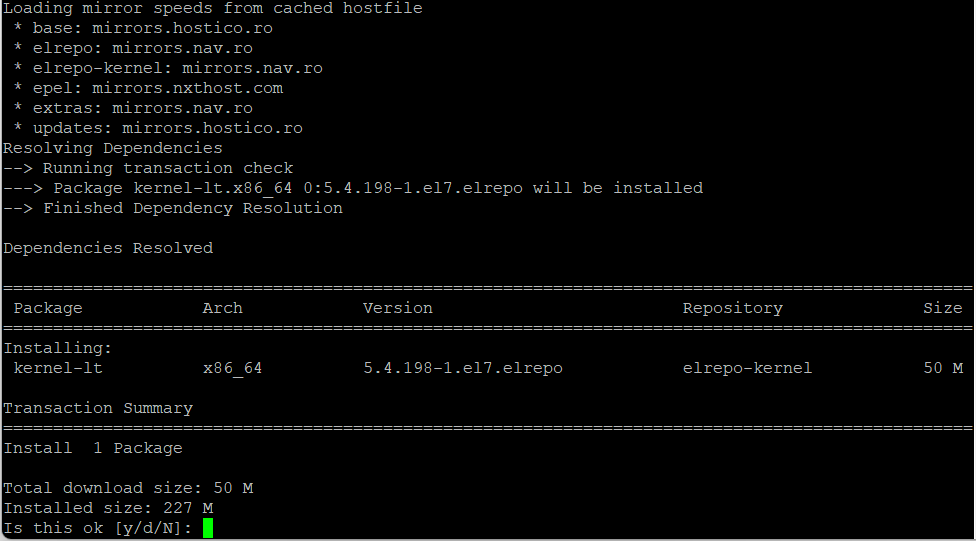
The system should download the software, then prompt you to confirm that it’s OK to install – type y and press enter.
Allow the process to complete.
Step 6: Reboot and Select the New Kernel
Reboot your system by running the command:
reboot
You’ll be presented with the GRUB, or boot menu.
Use the arrow keys to select the Linux kernel you have just installed, then press Enter. Your operating system should boot normally.
Step 7: Verify Functionality
Take a moment to check the functionalities of your CentOS system. Does all your software launch correctly and without errors? Do all your network functions work correctly?
Put your new kernel through its paces so all errors are identified and fixed in time. Or, if there aren’t any fixes, you can opt to switch back to the old kernel.
Step 8: Set Default Kernel Version
Once you confirm that the new kernel is compatible and working correctly, you’ll want to edit the GRUB boot utility so that, by default, it loads your new kernel.
Navigate to /etc/default/ and open the grub file with your text editor. Or, type the following in the terminal:
sudo nano /etc/default/grub
grub2-set-default 0
Once the file opens, look for the line that says GRUB_DEFAULT=X, and change it to GRUB_DEFAULT=0 (zero). This line will instruct the boot loader to default to the first kernel on the list, which is the latest.
Save the file, and then type the following command in the terminal to recreate the kernel configuration:
sudo grub2-mkconfig -o /boot/grub2/grub.cfg
Reboot once more:
reboot
Verify that the boot loader is set to load the latest kernel by default.
