


")

")


How To Manage The Network Bridge For KVM
This guide shows you how to manage the Network Bridge for KVM in Virtualizor.
Virtualizor will create a viifbr0 bridge.
viifbr0 assumes eth0 as the Network Device and detects the IP, Netmask, GATEWAY from :
/etc/sysconfig/network-scripts/ifcfg-eth0
or
/etc/network/interfaces
In the event you have a network device (network interface) other than eth0, e.g. eth1, then you can configure Virtualizor to use eth1 as the Network interface to create the bridge.
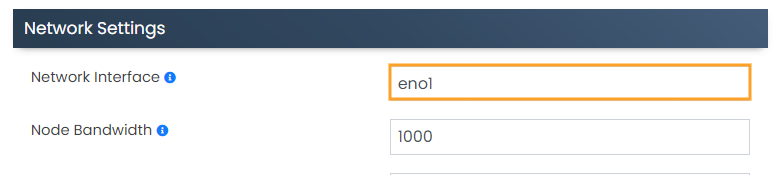
Network Interface
You can change these settings any time from the Virtualizor Admin Panel -> Configuration -> Slave Settings. The following is a screenshot of the available settings :
Note:
By default, eth0 will be assumed as the Network Interface. To tell Virtualizor to use anything other than that, please submit it here.
Managing The Bridge
Virtualizor will create a viifbr0 bridge.
Restart Command :
root> service virtnetwork restart
Start Command :
root> service virtnetwork start
Stop Command :
root> service virtnetwork stop
Making The Bridge Permanent
You can make the bridge a permanent one so that whenever the OS is started, it will start with the bridge as soon as the network is created.
This guide presumes the network interface is eth0 and OS is CentOS.
Note:
You will need bridge-utils package installed on your server Backup ifcfg-eth0
Backup ifcfg-eth0
The contents of /etc/sysconfig/network-scripts/ifcfg-eth0 will look something like the following :
root# cat /etc/sysconfig/network-scripts/ifcfg-eth0
DEVICE=eth0
BOOTPROTO=static
TYPE=Ethernet
HWADDR=00:25:90:98:35:90
IPADDR=10.0.0.93
NETMASK=255.255.255.0
GATEWAY=10.0.0.1
IPV6INIT=yes
IPV6ADDR=2607:f0d0:1002:0011:0000:0000:0000:0002
IPV6_DEFAULTGW=2607:f0d0:1002:0011:0000:0000:0000:0001
ONBOOT=yes
Make a copy of it :
root# cp /etc/sysconfig/network-scripts/ifcfg-eth0 /etc/sysconfig/network-scripts/ifcfg-eth0.bak
Create the Bridge File
root# vi /etc/sysconfig/network-scripts/ifcfg-viifbr0
You will need to copy some parts of ifcfg-eth0 to ifcfg-viifbr0 :
DEVICE=viifbr0
TYPE=Bridge
BOOTPROTO=static
IPADDR=10.0.0.93
NETMASK=255.255.255.0
GATEWAY=10.0.0.1
ONBOOT=yes
IPV6INIT=yes
IPV6ADDR=2607:f0d0:1002:0011:0000:0000:0000:0002
IPV6_DEFAULTGW=2607:f0d0:1002:0011:0000:0000:0000:0001
Now save the file.
Edit the ifcfg-eth0 File
root# vi /etc/sysconfig/network-scripts/ifcfg-eth0
It should look like the following :
DEVICE=eth0
HWADDR=00:25:90:98:35:90
IPV6INIT=yes
ONBOOT=yes
BRIDGE=viifbr0
If your Server belongs to the Hetzner data center, you will also need to rename the interface route file to the bridge’s route file under /etc/sysconfig/network-scripts/ directory.
root# mv route-eth0 route-viifbr0
Assuming eth0 is the NIC name, you will also need to change the interface name in that route file from eth0 to viifbr0.
root# mv route6-eth0 route6-viifbr0
Assuming eth0 is the NIC name, you will also need to change the interface name in that route file from eth0 to viifbr0.
Restart Network
We are almost setup now. Just make sure everything is correct before you restart the network. After that restart the network :
root# service network restart
Note:
Virtnetwork will not work anymore and you should restart only with network.
Ubuntu network interface File
Note:
You will need bridge-utils package installed on your server For IPv4 Configuration
root# nano /etc/network/interfaces
# The loopback network interface
auto lo
iface lo inet loopback

# Bridge for eth0
auto viifbr0
iface viifbr0 inet static
address 192.168.1.10
netmask 255.255.255.0
gateway 192.168.1.1
dns-nameservers 192.168.1.5
bridge_ports eth0
bridge_stp off
bridge_fd 0
bridge_maxwait 0
bridge_stp off – is a setting for spanning tree. If you have a possibility for network looks, you may want to turn this on.
bridge_fd 0 – turns off all forwarding delay. If you do not know what this is, you probably do not need it.
bridge_maxwait 0 – is how long the system will wait for the Ethernet ports to come up. Zero is no wait.
For IPv6 Configuration, edit the Following file :
root # vi /etc/sysctl.conf
Add the following line at the end of the file :
net.ipv6.conf.default.disable_ipv6 = 0
net.ipv6.conf.all.disable_ipv6 = 0
Save and exit the file.
The last file we need to edit is the interfaces file under the path /etc/network/
root # vi /etc/network/interfaces
Append the following lines to the file :
iface viifbr0 inet6 static
pre-up modprobe ipv6
address IPv6-IP-Address
netmask IPv6-NetMask
gateway IPv6-IP-Gateway-Address
Restart Network
We are almost set up now. Just make sure everything is correct before you restart the network. After that restart the network :
root# /etc/init.d/networking restart
Note:
Virtnetwork will not work anymore and you should restart only with the network.
Managing Bridge on Ubuntu 18.04 or higher
On Ubuntu 18.04 they have enabled netplans for network interface by default.
Either you can turn off the netplans and use the legacy method (i.e. /etc/network/interfaces) OR configure a Network Bridge as per the following guide :
To configure netplan, save configuration files under /etc/netplan/ with a .yaml extension (e.g. /etc/netplan/config.yaml),
then run sudo netplan apply.
This command parses and applies the configuration to the system.
Configuration written to disk under /etc/netplan/ will persist between reboots.
Note:
You will need the bridge-utils package installed on your server
Example file contents : /etc/netplan/01-netcfg.yaml
For Hetzner servers,
network:
  version: 2
  renderer: networkd
  ethernets:
    ens3:
      dhcp4: no
  bridges:
    viifbr0:
      addresses:
        - 10.1.3.43/24
        - "2001:cafe:face:beef::dead:dead/64"
      interfaces: [ ens3 ]
      routes:
        - on-link: true
          to: 0.0.0.0/0
          via: 10.1.3.1
      gateway6: fe80::1
      macaddress: 00:16:3e:7f:ae:93
      nameservers:
         addresses:
           - 8.8.8.8
           - 8.8.4.4
           - 2a01:4f8:0:1::add:1010
           - 2a01:4f8:0:1::add:9898
For other servers :
network:
  version: 2
  renderer: networkd
  ethernets:
    ens3:
      dhcp4: no
  bridges:
    viifbr0:
      addresses:
        - 10.1.3.43/24
        - "2001:cafe:face:beef::dead:dead/64"
      interfaces: [ ens3 ]
      gateway4: 10.1.3.1
      gateway6: "2001:cafe:face:beef::1"
      macaddress: 00:16:3e:7f:ae:93
      nameservers:
         addresses:
           - 8.8.8.8
           - 8.8.4.4
           - 2a01:4f8:0:1::add:1010
           - 2a01:4f8:0:1::add:9898
Netplan network bridge
After making the netplan Network Bridge, please add the interface name to Virtualizor as per the following guide :
